
Did you know that creating professional diploma templates used to take designers hours of painstaking work?
Surprisingly, this tedious process is now obsolete. With modern digital tools, anyone can create polished, professional-looking diploma templates in under 5 minutes—no design experience required. Actually, the right platform makes it simple to select layouts, customize content, add official signatures, and even incorporate digital verification features.
Furthermore, these quick-to-create diploma templates don’t sacrifice quality for speed. They maintain the formal, prestigious appearance that makes recipients proud to display their achievements.
This step-by-step guide will walk you through the entire process of creating impressive diploma templates efficiently. Whether you’re gearing up for a graduation ceremony, a professional certification program, or the completion of corporate training, you’ll discover how to create templates that appear expertly designed without the usual time commitment. Let’s get started!
Choose a Diploma Template
Selecting the right diploma template is the foundation of creating a professional-looking certificate. The template you choose will determine the overall look and feel of your diploma, making this step particularly important for creating impressive credentials.
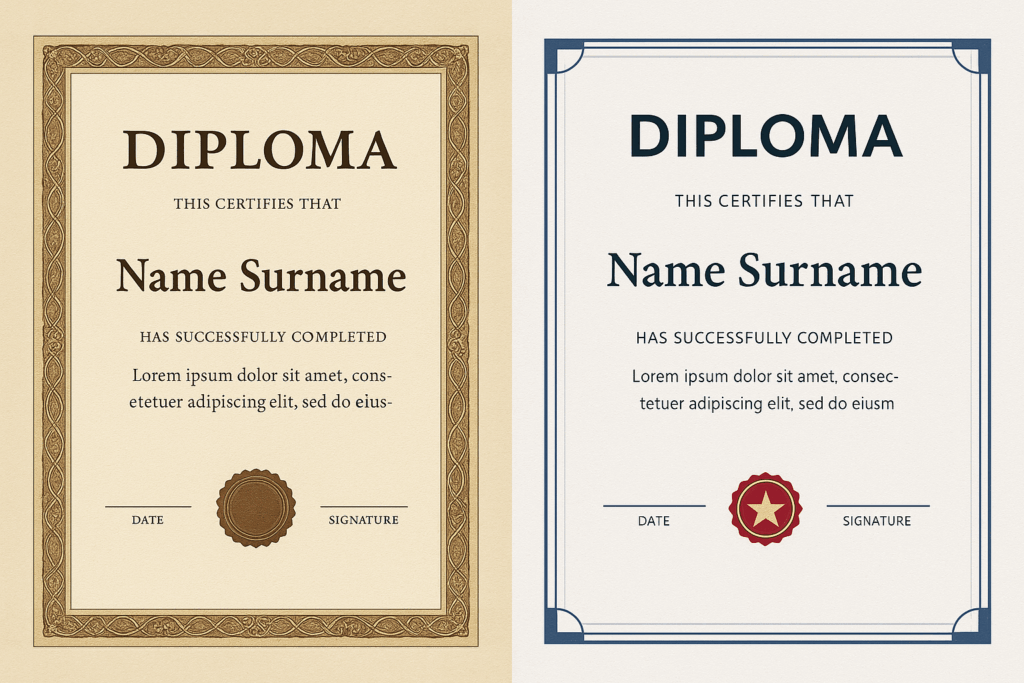
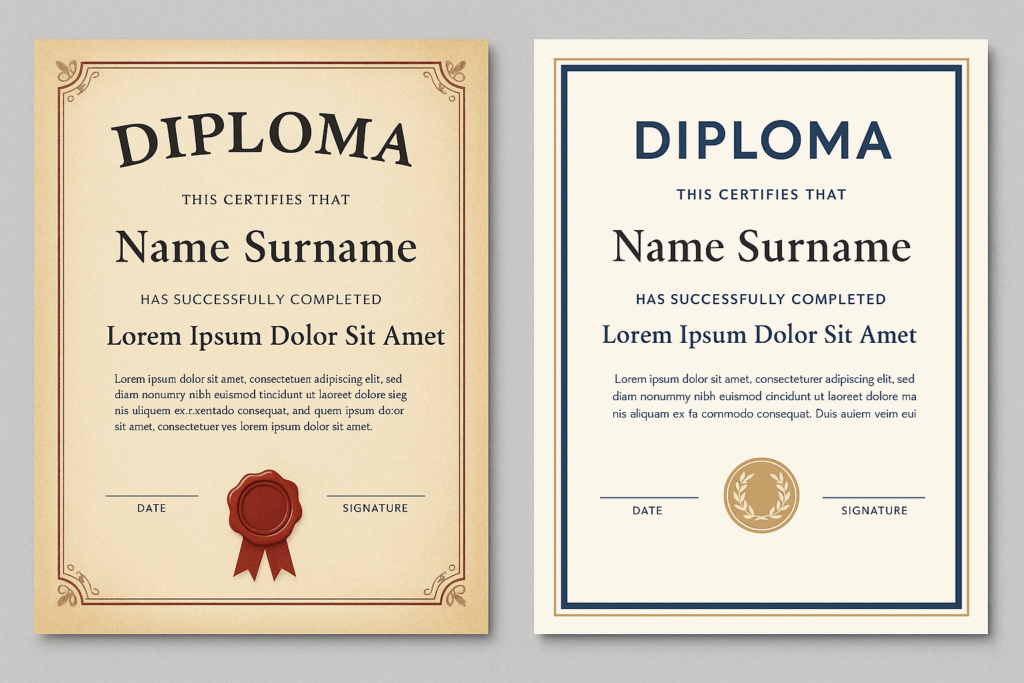
Pick from pre-designed templates
Beginning your diploma creation process with pre-designed templates saves significant time and effort. These templates control essential elements, including typography, wording, signature lines, seal placement, and paper orientation [1]. Most modern platforms offer numerous styles to match your specific needs:
- Formal and minimalist designs are ideal for professional qualifications and academic achievements, with sleek layouts that convey sophistication. [2]
- The traditional and formal styles areperfect for high school and college diplomas with classic blue designs. [3]
- Modern professional templates—contemporary designs suited for arts, design, and creative fields [4]
- Corporate professional options include sleek green designs specifically created to enhance business and finance achievements. [3]
When browsing templates, look for options that balance authenticity with readability. Effective templates typically combine calligraphic heading fonts with clean serif text for the body content [1]. Additionally, many platforms allow you to customize colors, add your institution’s logo, and adjust specific wording to make the template uniquely yours [2].
Consider layout: portrait vs landscape
The orientation of your diploma significantly impacts its appearance and practical use. Each option offers distinct advantages depending on your specific needs.
Portrait format (21 x 29.7 cm) maintains a more traditional and formal appearance. This orientation is generally preferred for academic qualifications and formal training programs where convention matters [5]. Portrait layouts excel when your diploma contains substantial text that needs to be displayed clearly and readable.
Landscape format (29.7 x 21 cm), on the other hand, offers a more modern and dynamic look. This orientation works exceptionally well for creative fields and when you plan to include more graphics or design elements [5]. Both formal minimalist and modern professional templates are typically available in landscape and portrait options [2][4].
Consider the primary display method when choosing orientation. If your diploma primarily appears on websites or social media, landscape format often displays better on digital screens. For diplomas that will be printed and framed, portrait orientation aligns better with traditional paper sizes and display preferences [5].
Select the right size:A4 or US Letter
Choosing the appropriate paper size is crucial for ensuring your diploma prints correctly and looks professional. The two most common sizes are A4 and US Letter, each with specific characteristics:
A4 size measures 210 mm x 297 mm (8.27″ x 11.7″) and serves as the international standard used worldwide [6]. It’s slightly narrower and longer than US Letter paper [7].
US Letter size measures 8.5″ x 11″ (215.9 mm x 279.4 mm) and is the standard in North America [7]. It’s a bit wider and shorter than A4 paper.
Though the difference may seem minor, it can cause significant problems when printing documents formatted for one size on paper of another size [7]. Many template platforms offer both options to accommodate users worldwide [8]. For specific needs, smaller diploma sizes such as 6″x8″ are also available for certain applications [9].
The right size choice typically depends on your geographic location and intended audience. For international recognition, A4 might be preferable, while US Letter works best for North American contexts. Ultimately, selecting the appropriate template, layout, and size creates the foundation for a professional diploma that will effectively showcase the achievement it represents.
Customize the Diploma Content
Once you’ve selected the perfect template, personalizing your diploma template with accurate and appropriate content makes it truly official. Customizing the core elements properly ensures your diploma will be both professional and meaningful to recipients.
Add institution name and logo
The name of your educational institution typically forms the most prominent text element on the diploma template. Place it at the top center position, where it immediately draws attention and establishes authority [10]. This positioning underscores the diploma’s credibility and the institution’s endorsement of the recipient’s achievement.
Your institution’s logo or crest serves as a visual anchor for the entire diploma, symbolizing its heritage and authority. Consider these implementation details:
- Position the logo prominently, typically centered near the top of the diploma
- Maintain appropriate sizing—large enough to be clearly visible but not overwhelming other content
- Ensure high resolution to preserve crisp details when printing
- Incorporate school mottos or crests to reinforce your institution’s unique identity [11]
For branding consistency, choose formatting, fonts, and language that align with your institution’s established visual identity [11]. This consistency extends beyond just the diploma itself, reinforcing institutional recognition across all official documents.
Edit recipient name and title
The recipient’s full name deserves special attention as it personalizes the diploma to the individual. Display it prominently, often using a larger font size than surrounding text to emphasize its importance [10]. This personal touch transforms a generic certificate into a meaningful recognition of individual achievement.
When entering names, verify several important details:
- Confirm correct spelling before finalizing
- Include appropriate formatting elements like hyphens, spaces, and capitalization
- Add accent marks or special characters when needed for accurate name representation [12]
- Make the name stand out visually using larger or bolded fonts [13]
Notably, most institutions have specific policies regarding titles on diplomas. Stanford University, for example, prohibits additional titles such as “Esq.” or “Dr.” on diploma names [12]. Check your institution’s guidelines regarding these conventions before finalizing your templates.
Many modern diploma creation platforms provide flexible options for name handling, including:
- Personalized templates where you manually enter each name
- Templates with standardized formatting but blank name fields
- Word templates formatted for your specific design that allow you to print names onto pre-printed diploma sheets [14]
Write a clear and concise description
The conferment statement forms the heart of your diploma, officially declaring the achievement being recognized. Traditional phrasing often includes statements like “has been awarded,” “has successfully completed,” or similar formulations [10]. This language formally establishes what specific accomplishment the diploma represents.
For effective description writing, follow these principles:
- Begin most sentences with strong verbs that clearly convey the action or achievement
- Use present tense and active voice consistently
- Keep content student-centered, explaining how the achievement benefits the recipient
- Avoid beginning with phrases like “This course…” [15]
- Match the tone and significance to the level of achievement being recognized [11]
The description should be clear and concise, avoiding unnecessary technical jargon while still accurately representing the accomplishment. For academic credentials, include the specific degree awarded and possibly the field of study or specialization. For certifications or professional development recognitions, clearly state the skill or knowledge area mastered.
Remember that diploma descriptions serve multiple audiences beyond just the recipient—employers, other educational institutions, accrediting bodies, and even parents may review these documents [15]. Consequently, ensure your wording maintains appropriate formality while still being understandable to various stakeholders.
By thoughtfully customizing these three core elements of your diploma template, you create documents that not only look professional but also carry legitimate meaning and value for recipients.
Add Signatures and Authority Details
Authentic signatures transform a basic diploma template into an official document that carries authority and legitimacy. These critical elements provide the final touch of credibility that recipients, employers, and institutions recognize as marks of genuine achievement.
Upload scanned signatures
Creating diplomas with authentic handwritten signatures requires a straightforward process that preserves the personal touch of actual signatures. To begin, write your signature clearly on a blank piece of paper, then scan the document and save it in a common file format like JPG, PNG, GIF, or BMP.
For optimal results, follow these technical specifications:
- Image height should be approximately 145 pixels
- Signatures can measure up to 400 pixels wide
- Maximum file size should not exceed 200 KB
After scanning, crop the signature image to your preferred size, focusing solely on the signature itself. This cleanup process ensures the signature appears crisp and professional when added to your diploma template.
Most diploma template platforms provide dedicated signature fields where you can easily upload your scanned image. Position the signature appropriately—typically at the bottom corners of the diploma or centered along the lower edge. Proper placement creates balance and follows traditional document standards.
For those working on mobile devices, consider using a tablet or smartphone with a stylus to capture your signature. Drawing freehand works best with a stylus but can be accomplished using a mouse pointer or even your finger on touch-screen devices.
Use signature-style fonts if needed
When a scanned signature isn’t available or practical, signature-style fonts offer an excellent alternative that maintains a professional appearance. These specialized fonts mimic handwriting and provide consistency across multiple diplomas.
Several elegant signature fonts work particularly well on diploma templates:
- Brush Script—Features fluid strokes and artistic energy that add class to documents
- Edwardian Script – Offers refined cursive styling ideal for formal diplomas
- Vivaldi—Provides smooth, flowing strokes that capture handwritten script essence
- Lucida Calligraphy—Resembles traditional calligraphy with rich, flowing design
To implement these fonts, select the text where the signature will appear, then choose your preferred signature font from the Fonts dropdown menu. Most modern word processors and design platforms include several script options that work well for signature lines.
Remember that diploma signatures typically use stylized script fonts to mimic natural handwriting. This approach creates visual distinction between the signature and the standard text in the diploma, drawing attention to the authoritative endorsement the signature represents.
Include official titles and names
Authentic diplomas typically contain one to three signatures representing school officials such as the president, registrar, or board chair. These signatures must include proper titles to establish authority and follow institutional protocols.
When adding official signatures to your diploma template, include these essential elements:
- The official’s full name in signature format
- Their precise title within the institution
- Proper alignment beneath the signature
- Consistent styling across all signature fields
In the “Signature Setup” dialog box of most platforms, you’ll need to enter specific information:
- Suggested signer’s full name
- Suggested signer’s title
- Suggested signer’s email address (if needed)
- Any special instructions for the signing process
Official titles should be accurate and reflect current positions within the organization. Consider including titles such as “University President,” “Dean of Students,” “Board Chair,” or “Program Director” depending on your institutional structure.
Importantly, when using actual names of officials, obtain proper permission before incorporating their signatures into diploma templates. Many institutions have policies governing the use of official signatures, particularly when they appear on formal documents.
By carefully integrating these signature elements, your diploma templates gain the authority necessary to be recognized as legitimate credentials rather than merely decorative certificates. The attention to signature details marks the difference between amateur-looking documents and professional credentials that recipients will proudly display.
Enhance with Digital Features
Modern diploma templates now exceed traditional paper credentials by incorporating digital verification features. These technological additions transform simple certificates into secure, verifiable documents that resist tampering and fraud.
Insert a QR code for verification
QR codes have revolutionized credential verification by connecting physical diplomas to digital verification systems. When scanned with any smartphone or QR code reader, these compact squares instantly direct viewers to a secure verification page hosting the official, tamper-proof record of the certificate [16].
Implementing QR codes in your diploma templates offers several distinct advantages:
- Provides instant access to credential information, eliminating manual verification processes
- Establishes tamper-resistant security through digital signatures or cryptographic hashes
- Creates digital backups of credential information
- Enables real-time validation through links to online databases [17]
During implementation, the QR code generation process embeds essential credential details, including the recipient’s name, credential title, issuer information, issue date, and unique identifiers [17]. Many modern platforms automatically generate unique QR verification codes for each certificate and embed them directly in the design [18].
For optimal functionality, position the QR code prominently yet unobtrusively on the diploma—typically in a bottom corner where it won’t detract from the overall design. Ensure the code remains large enough (at least 2 cm square) to be easily scanned from a printed document.
Add a diploma ID for tracking
Every professional diploma template benefits from incorporating a unique identifier that distinguishes it from all other credentials your organization issues. This diploma ID serves as both a tracking mechanism and a verification reference point.
The ID typically appears as a numeric or alphanumeric code printed directly on the diploma, often near the bottom margin or incorporated into the verification QR code. This unique identifier connects directly to your verification database, allowing instant confirmation that the diploma is legitimate.
For effective implementation:
- Use a consistent ID format across all diplomas
- Incorporate sequential numbering or date-based codes for easy organization
- Include the ID in your records database for quick reference
- Make the ID part of the QR code’s encoded information
When someone needs to verify a credential, they can either scan the QR code or manually enter the diploma ID into a verification system. This dual verification approach provides flexibility while maintaining security.
Include a badge or seal for authenticity
Digital badges and seals offer compelling visual indicators of authenticity while providing additional verification layers. Unlike traditional embossed seals, digital alternatives can incorporate blockchain technology for unalterable verification that maintains integrity over time [3].
Digital badges effectively replace paper certificates by creating portable digital credentials that verify accomplishments, skills, credentials, and experiences [19]. These badges can be:
- 100% verifiable and secure
- Controlled through expiration rules
- Recorded on blockchain for additional security
- Easily shared across social networks and professional platforms [19]
To incorporate digital badges into your diploma templates, consider including:
- A visual badge image on the diploma itself
- Links to the digital badge within QR code verification
- Instructions for recipients on accessing and sharing their digital credential
Indeed, many platforms allow recipients to share their certified documents through secure PDFs with embedded QR codes, direct links, or social network integration. Each shareable version maintains real-time verification of authenticity and validity [20].
For maximum security, ensure your digital seals incorporate visible verification elements like the organization’s logo alongside embedded digital signatures that replace traditional wet ink signatures [21]. This approach creates non-repudiable, legally binding documents with established audit trails documenting the signing sequence [21].
Send and Share the Diploma
After creating your professional diploma template, distributing it efficiently to recipients becomes the next crucial step. Modern digital platforms offer streamlined methods for sending diplomas that save time while maintaining professionalism.
Send via email to individuals or bulk list
Distributing diploma templates via email eliminates the manual work previously required for certificate distribution. Modern platforms allow you to send hundreds of certificates simultaneously, automatically matching each recipient with their personalized credential [1]. This approach dramatically reduces administrative workload—issuing 5 or 5,000 digital certificates can take precisely the same amount of time when using bulk distribution [22].
To prepare for bulk distribution:
- Create a CSV file with each row representing a different recipient
- Include columns for variable attributes like Name, Course Name, and Date of Completion
- Upload your completed CSV file to your chosen platform
- Verify data mapping to ensure accurate information assignment [23]
Most platforms provide advanced options to enhance your email distribution process. You can add CC or BCC recipients to keep supervisors or administrators informed, set custom reply-to addresses for recipient questions, and even resend emails to entire recipient groups simultaneously if needed [1]. Moreover, this automation eliminates the tedious process of manually sending individual certificates.
Preview before sending
Verifying your diploma templates before distribution is essential to prevent errors that could diminish their professional impact. Comprehensive platforms offer preview capabilities that let you examine exactly how each recipient’s personalized diploma will appear before finalizing distribution. [1].
During the preview phase:
- Check that all recipient data populates correctly in the template
- Verify the diploma appears correctly formatted with proper alignment
- Confirm that signatures and official seals display properly
- Ensure all variable fields contain accurate information
Many systems include a “Preview Before Publishing” feature that generates all certificates for review prior to distribution [22]. Thereafter, you can send test emails to yourself or colleagues to verify how the email appears in different email clients and ensure links function properly [1]. This verification step helps maintain the professional impression your diploma templates should convey.
Allow recipients to download as PDF
Once recipients receive their diploma notification, they need convenient options for accessing and using their credentials. Offering PDF download capability provides recipients with a universally compatible format that preserves the professional appearance of your template.
Recipients typically gain access to their personalized diploma by clicking a button within the email body [22]. Subsequently, they can download their certificate as a PDF file without additional costs. This accessibility ensures they can easily:
- Store the credential digitally for personal records
- Print physical copies when needed
- Attach the diploma to job applications
- Share achievements across professional platforms
For administrators, export options usually include downloading PDF files individually or exporting all credentials in bulk as a compressed file [24]. Some platforms automatically create separate emails for each recipient containing their personalized diploma, eliminating the need for manual file separation [22].
Many modern systems offer recipients additional sharing capabilities beyond basic PDF download. These often include options to share the document directly on social media platforms, add the credential to LinkedIn profiles, or verify the certificate’s authenticity [22][25]. This integration creates a seamless experience from receipt to professional showcase.
Tips for a Professional Look
The final polish of your diploma template determines how recipients perceive its value and legitimacy. Professional-looking diplomas combine thoughtful design elements that work together harmoniously to create documents worthy of display.
Use consistent fonts and colors
Typography choices dramatically impact how your diploma template is perceived. Select no more than two complementary fonts that reflect the character of your institution while maintaining excellent readability. Accordingly, pair a classic serif font like Times New Roman or Garamond for the main text with a more decorative font for headlines and recipient names. This combination creates visual hierarchy while preserving elegance and a formal appearance.
Colors convey psychological messages that influence how recipients value their diplomas. Gold and silver tones symbolize prestige and success, whereas pastel shades create a modern, fresh impression. Essentially, limit your palette to 2-3 complementary colors to maintain visual harmony. High contrast between text and background ensures legibility—dark text on light backgrounds typically works best for formal credentials.
Avoid cluttered layouts
One common mistake in diploma design involves filling every available space with decorative elements. In essence, effective diplomas utilize white space strategically to give the design “room to breathe” and appear more premium. Create a clear, spacious area at the center where the recipient’s name and achievement details stand out prominently.
Graphic elements like borders, seals, and decorative lines should complement your content instead of competing with it. A balanced composition places the most important information—name, credential, and date—at the visual center, with supporting elements arranged proportionally around it. This approach prevents the cluttered appearance that diminishes perceived value.
Test print before finalizing
Above all, verify your diploma template’s appearance in physical form before distribution. Different printers may render colors and fine details differently than they appear on screen. Print samples on the actual paper you plan to use—parchment paper provides an especially professional look and feel compared to standard office paper.
Examine printed tests under various lighting conditions to ensure all elements remain clearly visible. Pay particular attention to small text, fine lines in borders, and signature details that may become muddied in printing. This verification step prevents disappointing recipients with diplomas that look impressive digitally but underwhelming when printed and framed.
Conclusion
Creating professional diploma templates has transformed from a time-consuming design task into a simple, five-minute process accessible to anyone. The right digital platform empowers you to craft credentials that look professionally designed while saving countless hours of work. Therefore, recipients can proudly display their achievements with documents that maintain the formal, prestigious appearance they deserve.
Throughout this guide, we’ve explored each crucial step—from selecting appropriate templates and layouts to customizing content with institution details and recipient information. Additionally, we’ve covered how to enhance credibility through proper signatures, official titles, and digital verification features like QR codes and unique IDs. These elements work together to establish authenticity and prevent fraud.
The distribution process likewise benefits from digital efficiency. Bulk email options allow you to send personalized credentials to hundreds of recipients simultaneously, while PDF download capabilities ensure recipients can easily store, print, or share their achievements. Consequently, both administrators and recipients enjoy a streamlined experience.
Remember that visual presentation ultimately determines how your diplomas are perceived. Clean layouts with strategic white space, consistent typography, and complementary colors create documents worthy of display. Most importantly, test prints on quality paper ensure your digital designs translate perfectly to physical form.
The days of painstaking diploma design are certainly behind us. Armed with these techniques, you can now create professional-looking credential templates that honor achievements appropriately while respecting your valuable time. Start implementing these practices today, and your diplomas will impress recipients and viewers alike with their professional quality and authenticity.
References
[1] – https://certifier.io/features/automatically-send-certificates-and-badges
[2] – https://certifier.io/certificate-templates/formal-minimalist-diploma-template
[3] – https://www.verifyed.io/blog/custom-badge-creation-guide
[4] – https://certifier.io/certificate-templates/modern-professional-diploma-template
[5] – https://www.open-cpd.com/general-information/portrait-or-landscape/
[6] – https://www.colorcopiesusa.com/paper-sizes-guide-us-vs-international.html?srsltid=AfmBOorsY9EBGz0r1Rjh6fXsqfw1SUhPU6OA5Rx2MAjrROaswsWabsZG
[7] – https://uk.onlinelabels.com/articles/difference-between-us-letter-a4-paper-sheets?srsltid=AfmBOorAQBWQjXU28G6pDPo31HkFTNlByM-giZBohGFHxdOLva-HCNSQ
[8] – https://certifier.io/blog/ideal-certificate-size
[9] – https://www.homeschooldiploma.com/personalized-high-school-diploma-for-homeschools/?srsltid=AfmBOorb_QDPtRh5GQHzVN0hQlJctIoNKoDf9BE0qJA_SNpmQ_HMbdQ3
[10] – https://www.graduationsource.com/blog/a-graduation-coordinators-guide-to-designing-a-great-diploma?srsltid=AfmBOopWJHEba8OxhyKH65NSJpiCtsWe7cn1rxbWKw1WsjMlqPMo4A5c
[11] – https://www.paperdirect.com/blog/2025/05/diploma-wording-ideas-ready-to-use/?srsltid=AfmBOopUWuXvw15a3s7j_5QEEEpbk4m_bw3tli4Qz3zwbL6e7nc-sIf0
[12] – https://studentservices.stanford.edu/my-academics/earn-my-degree/diplomas/how-do-i-edit-my-diploma-name
[13] – https://www.paperdirect.com/blog/2025/05/diploma-wording-ideas-ready-to-use/?srsltid=AfmBOopeB1rr3E6Nly5VU7dGQqOzAfNp5_qgIndgff9D787Q–6VQo75
[14] – https://graduationink.com/shop/high-school-diploma-design-printing/?srsltid=AfmBOoqARq_3bYY1mMZw8BcVhlG-Ay1_xXz8pue5_Tldd8wZwXUjCv0v
[15] – https://drew.edu/academic/office-of-the-registrar/faculty-staff-tools-info/writing-a-course-description/
[16] – https://www.certify.one/blog/providing-instant-verification-for-your-certificates-with-integrated-qr-codes
[17] – https://diplomasafe.com/qr-code-verification/
[18] – https://diplomium.com/en/blog/complete-guide-to-creating-digital-certificates-with-qr-verification
[19] – https://badgecert.com/
[20] – https://www.smartcertificate.com/en-us/
[21] – https://www.identrust.com/digital-certificates/digital-signing-sealing
[22] – https://certifier.io/blog/how-to-send-an-email-with-certificates-to-multiple-recipients-3-ways-to-do-it
[23] – https://certifyme.online/blog/send-bulk-certificates.html
[24] – https://certifier.io/features/design/create-certificate-design-in-pdf
[25] – https://www.parchment.com/platform/higher-education/diploma-services/

